
Tunturi Hat Free Pattern


即時
在庫状況
商品説明
| Sizes | ||||||
|---|---|---|---|---|---|---|
| XS | S | M | L | XL | ||
| Head size (C) | 51-53 | 54-56 | 57-59 | 59-61 | 62-64 | |
| Fabric (2 hats) | ||||||
| Main / Lining | 0.3 m | |||||
| Version C | 0.4 m | |||||
| Supplies (2 hats) | ||||||
| Stretch binding | 2 m | |||||
| Stretch Cord | 0,4 m (version A ) | |||||
| Cord Stopper | 2 (versio A) | |||||
Material
Included sizing is for stretch fleece, if material does not stretch, make one size larger than the measurements say. Recommended fabrics include Polartec WindBloc, 100, 200, PowerStretch or any other medium weight fleece.
Sizing
Sizing is for fleece with at least 25% stretch in this pattern. If you use a non-stretch material, cut one size larger.
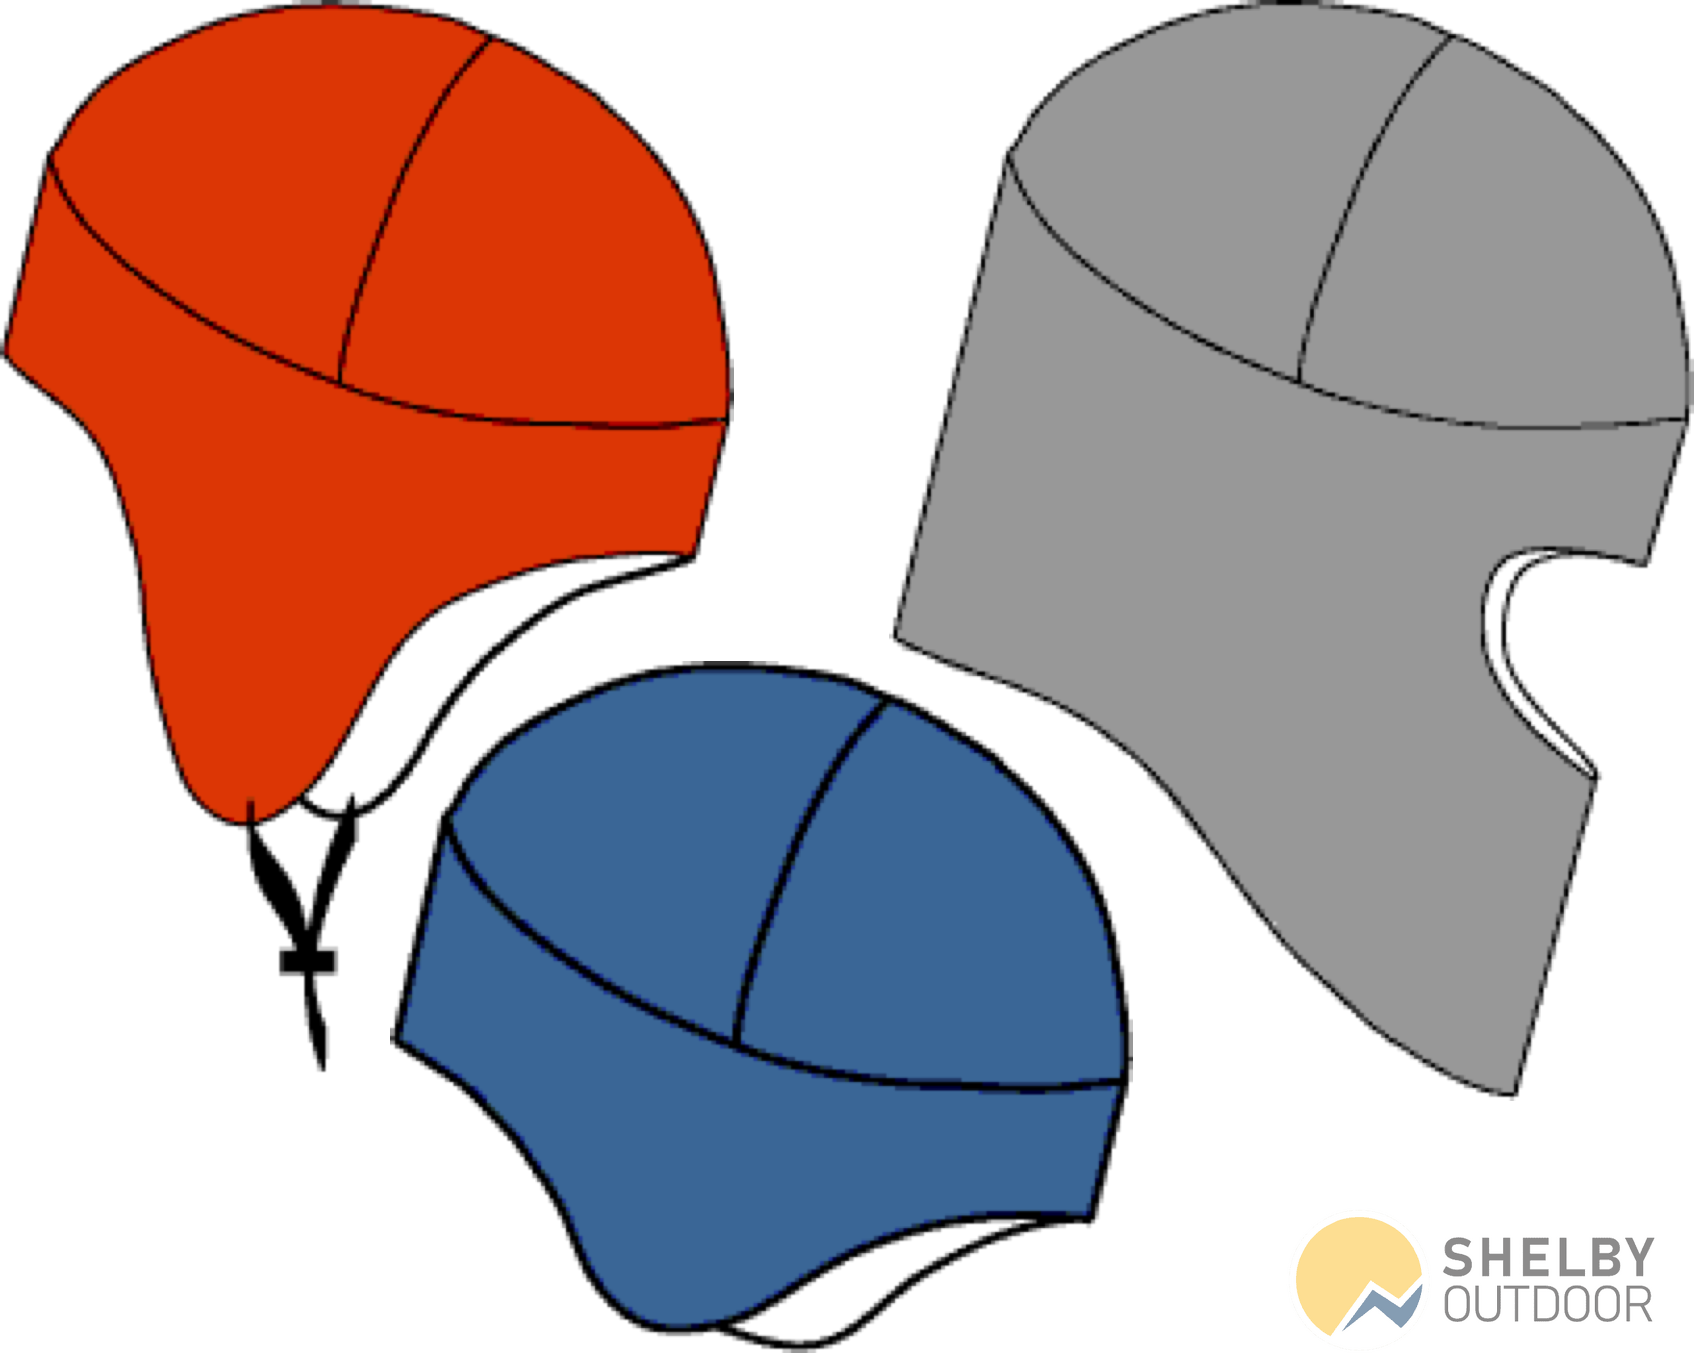
Options
This pattern includes three different hat versions and the option of adding a liner. For all versions the top of the hat is identical, only the ear piece differs. A lining is added by making an identical hat from lining material, however one size smaller, then attaching it around the edge of the hat. The lining can be attached either with stretch binding (as is done in a non-lined hat), or with a finished seam. In order to finish with a seam, a 5 mm seam allowance must be added to the lower edge of the ear piece. There is no need to use flat seaming on the lining as the seams are anyways hidden.
Remember
No seam or hem allowances in the pattern! If sewing using a flat-stitch technique seam allowances are not needed. Otherwise if making a normal seam add a 5 mm seam allowance when cutting.
- Download the PDF pattern and print it. Below you will find PDFs for A4, A3, Letter and Tabloid paper sizes. Do not apply any scaling. The pattern consists of pages that need to be overlapped and taped together. The alignment marks form boxes with an X in the middle. Download Pattern through the links at the end of the page.
-
Cutting
Choose the correct size and version of the hat according to the sizing chart. You will need to cut 4 top pieces, and one ear piece along the fold. Be sure to align the pieces so stretch tgoes along the length of the hat, from front to back. When cutting, mark the single and double notches on top pieces, assembly can be confusing without them.

-
Top
 You have four top pieces. Lay the pieces out so that single and double notches match. First sew together the pieces along the seam with a single notch. Next sew together these two larger pieces matching double notches. This seam is the front/back seam. Clearly mark either end as the front.
-
Ear flap
The ear flap is first finished by sewing along the back seam to make a cylinder. After sewing the back seam try it on to check the fit. This should be slightly tight as fleece stretches. If it feels loose, take in the back seam some and try again. Next the top and earpiece are sewn together. Align the front/back seam of the top piece so that it matches the front/back of the ear piece. Pin carefully, then sew the pieces together.
-
Lining (optional)
If you have chosen to add a lining, follow these steps. Sew an identical hat from lining fabric following steps 1-3. If you want an edge using stretch binding, turn the lining inside out and place inside the hat. Sew close to the edge with a long stitch (temporary) and go to step 5. If a finished seam is wanted, sew the hat and lining around the edge, right sides together, leaving a 5cm gap. Pull the lining through this gap, and finish the 5 cm hole by hand or by topstitching.
-
Finishing
 n this step an edge binding is attached along the whole edge of the hat. This gives a finished stretchy edge to the hat. Skip this step if a finished seam was made between the lining and hat. Starting from the back, sew the stretch binding along the edge of the hat, stretching while sewing. Sew close to the upper edge of the binding, but be sure to catch the back of the binding in the seam. Stretch the binding more along the front and back, less around the ears. For version C (balaclava) stretch binding is also needed around the face hole regardless of the lining.
Version A: Sew stretch cording to the ends of both ear flaps, using a cord stopper to connect them.
Version B: No finishing needed.
Version C: No finishing needed.

添付資料
| 403_pattern_A3.pdf |
| 403_pattern_A4.pdf |
| 403_pattern_tabloid.pdf |
| 403_pattern_letter.pdf |
| 403_balaclava_A3.pdf |
| 403_balaclava_A4.pdf |
| 403_balaclava_tabloid.pdf |
| 403_balaclava_letter.pdf |
コメントコメントを追加する